Sleep Buddy

I don't expect my babies to sleep through the night until they're 1.  Some might think I'm crazy, but it's hard for me to wean nighttime feedings until I stop breastfeeding.  Everyone does things their own way and this is our way.  Anyway, Mia was an awesome sleeper from age 1-1.5 and when Mia was 1.5, Naomi was born and it rocked her world.  She went from a super star sleeper to kid who would come up with every and any excuse not to stay in her bed.  And, she would then wake up WAY too early!  All of this resulted in a crabby toddler and sleep deprived parents who hated bedtime/nap time because it took way longer than it should!


It got to the point where I would LOVE if Mia fell asleep in the car, because I could just transfer her to her bed for nap time instead of dealing with it.


She would wander out of her room, destroy the upstairs and fall asleep in random spots.


She would also have to cry herself to sleep because sometimes our only option was locking her door.  We didn't like doing this but knew that she needed to sleep and sometimes it was the only way to keep her contained.

A few months ago, I started researching some other options and came across the Sleep Buddy.  It got amazing reviews on Amazon and a lot of parents said it changed their life!  I was a little skeptical but slightly desperate, so I ordered one.  With shipping, it was around $45.  Joe thought I was crazy (especially when he say how simple it was).  You set a timer for nap time and nighttime- when the blue light it on, the child stays in bed and when it turns off, they can leave their room.


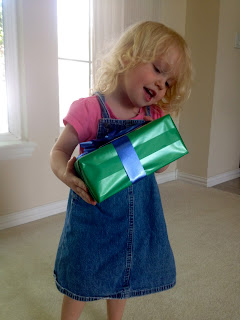
It came wrapped as a present, which was super fun for Mia!


We have been using this system for over a month and it has been AMAZING!  Mia stays in her room and actually runs to her bed when Sleep Buddy comes on.  She is now in her room until 6am every day (this might seem early to most but she was getting up at 5am or earlier before).  


It also came with a sticker chart, which has been really helpful at encouraging Mia to listen to her Sleep Buddy.


Seriously, look at this happy girl!  Yay for sleep!!


Of course this thing isn't perfect... here are a few of the negatives:  
  • It doesn't have a battery back-up so if your child unplugs it, the light will shut off.  Mia has unplugged it a few times but since she didn't get a sticker on her sticker chart when she unplugged it, she has stopped. 
  • If it gets unplugged, you have to reset the clock and sleep timers again.
  • The book it comes with is super cute and clearly explains how the Sleep Buddy works, but doesn't mention that it's okay to get out of bed if you have to go potty.  Not a huge deal, but be sure to have this conversation with your child.


*This is not a sponsored post...maybe someday I'll be cool enough for sponsors. : )


1 comments:

Milk Break

The girls looked so cute drinking milk, sitting in their chairs (Pottery Barn Anywhere Chairs), I just had to snap a few pictures. I just love watching these two interact...somedays I can't believe I am the mommy to a 1 and 2 year old!


0 comments:

Letter of the Week: Ii


I Wanna Iguana is such a CUTE story (I might have enjoyed it more than Mia).  The book is a series of letters between a mom and son.  The son wants an iguana and explains in each letter why it's a good idea and the mom explains why it is not.  Should I Share My Ice Cream? actually made me tear up, it is a super sweet story about an elephant that doesn't know if he should share his ice cream or not.  Both books have great endings, I highly recommend getting them the next time you're at the library!

I is for Ice

I couldn't think of anything that started with i for our Ii sheet this week.  Then, ice popped into my head!  First, Mia colored with marker.  Then she used an ice cube to "paint" over it!  It gave it a watercolor effect, which was something different and fun!


The girls loved playing with ice (I am loving that Naomi is now old enough to participate!)


I is for Igloo


Seriously, this kid cracks me up!  


I love simple projects like this that are great for fine motor skills.


I is for Iguana


I is for Ice cream


You can't talk about the letter i without having ice cream! Daddy took Mia out for a special treat and a reward for filling up her Sleep Buddy stick chart (I'll explain more in a different post because the was the Sleep Buddy was the best $47 I've spent!)


Mia loves this ice creaming counting printable.  She struggles with the higher numbers, so we just used 1-5.


0 comments:

Letter of the Week: Rr


Boy + Bot is such a cute story about a little boy and robot.  The robot thinks the little boy is broken and tries to fix him but later discovers that he was only sleeping.  Red Red Red is about a turtle on the quest to find something red.  He passes a lot of red things to find what he is looking for (I'll let you read it to discover what it is).

R is for Red


We painted our Rr sheet red this week.


R is for Robot
We made a giant robot, which we named, Rosie, out of boxes.  To make a "recycled" robot, you will need to plan ahead (unless you already save boxes).  We shop at Costco, so it wasn't too hard to get enough pieces!  One suggestion...be sure to have two identical boxes for the legs and arms.

We used Duct Tape to stick the pieces together and reinforced with clear packing tape where needed.


I had Mia color Rosie (to give her a sense of ownership over the project).

Rosie and Mia
For the face, we used large googly eyes and I cut out a small square, two circles and a long rectangle for the face...Mia glued them on a large pink square.

R is for Road


Both of these books are very toddler friendly with minimal words and bright, colorful illustrations.


This was such a fun project...Rr road with Blue Painter's Tape.  I created a giant upper and lowercase r in our foyer and brought our car bin upstairs for the girls to play with.  This was so much fun and an awesome way to teach the letter R!


I love when you can seamlessly add learning to play!


R is for Rainbow


This is a super easy rainbow craft that is a great tool for color recognition. It just requires a little prep work for your little one. 

Prep: Cut out a cloud and strips of paper (we didn't have purple paper, which is why it is missing)

1. Help your toddler glue the strips of paper to the cloud.  Mia did this step herself, which is why the colors are not in correct rainbow order.

2. Help your toddler glue cotton balls to the cloud.

3. Hang up to admire.


This project was inspired by the book, Painting a Rainbow by Lois Ehlert.

Supplies needed: Contact paper, strips of green paper (stems), leaves and different colors and types of flowers. I used the book for inspiration.


1. Tape the contact paper (sticky side up) to a surface or wall.


2. Let your child create their own rainbow of flowers!


Next week...Ii


0 comments:

Copyright © 2013 Keeping up with the Joneses and Blogger Templates - Anime OST.